Larry drove up the cruiser for me and was here for about 4 hours. They had time to get a trim before rushing Larry to the Airport! What a great Father-in-law, maybe next time he can stay at least a full day:)
Tuesday, July 13, 2010
Father and Son
Posted by Jessica and Todd at 8:44 PM 0 comments
Some things are better new
When we moved in the sellers had left us this lawn mower. Wow were we stoked. Until Todd went to mow the lawn for the first time. It took him about 2 hours to mow the front because it would just die every time he moved forward an inch. Notice the tape that is holding the wheel on. Todd tried reviving it with some new parts, but that bad boy never wanted to do it's thing.
We gave in and purchased this red beauty. What a proud mower Todd is:)
Our neighbors probably were wondering what kind of nutzo's moved in, with me taking pictures of Todd mowing.
Posted by Jessica and Todd at 8:32 PM 0 comments
Mystery Chair Reupholsering
Check out this $5 find at a G-sale. It almost didn't make it in our car, but Todd was determined and I'm so glad he was!
Pretty bad rip, Right!
I removed all the wicker and made sure it was all smooth.
First I had to start backwards and put the green back on with a heavy duty staple gun. Then I added a little padding and started nailing down the webbing. This was my first time doing this and it really was not that hard.
You nail 3 nails in the webbing then trun the webbing back and nail 2 more nails.
More padding. This foam is about 1 1/2" thick.
Staple down muslin to curve out all the foam. Make sure you start from the middle and then work your way out to the corners. The curve of this chair made it a little challenging to get it smooth.
I wanted it to be really comfy. So more padding!
Nailing down the fabric.
Finally the nail heads.
And here it is! So here is why I called it a mystery chair. See under the arms of the chair there is another piece of wood. Well that piece actually swings all the way out. So...Our guess is that it might be an old birthing chair. Any ideas on what it is for we would love to know.
Posted by Jessica and Todd at 6:29 PM 0 comments
Monday, July 12, 2010
Recovering Dining Room Chairs
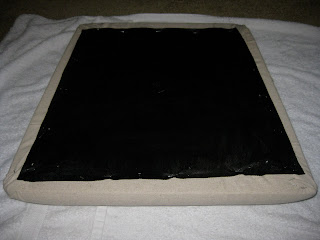
First step is to unscrew the chair pad off the chair. Then get the nasty old fabric off as fast as you can!
Cut out your new fabric giving it about 4 inches on all side to be folded over. You want to start in the middle on all side and then do the corners. Make sure you pull as tight as you can and staple it until you feel every inch is secure.
I was able to reuse the old black bottom cover. They sale this at any fabric store if yours is in bad shape. Staple it down making sure all the other staples are covered for a clean finish.
Flip it over and you have a brand new chair!
Lola always likes to be in the center of attention.
Posted by Jessica and Todd at 11:27 PM 2 comments
Furniture Transformations- Dining Table
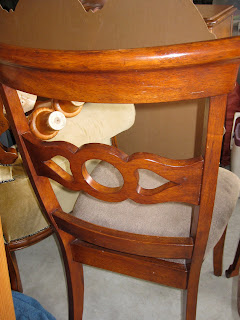
I searched all over and we ended up getting this table from a lady on craigslist. We payed $300 and that included the table and 8 chairs.
Sanding down and getting rid of all the varnish was the hard part. We bought a rotary sander and used 120 grit sand paper. After a full day of sanding I was a little impatient and thought I got most of it off and started to stain using Minwax poly shade. I let it set for 3 days and the dang thing would never get dry. So I had to start the whole process again. Using a stripper this time and really making sure I got all the varnish and stain off I decided to stain the right way. I used Minwax again but the regular mahogany stain. Then I used Poly top coat. Tip- On the last layer of the brush on top coat. Use 600 grit wet sand paper on the surface and then finish it off with a spray can of poly. This will eliminate any bumps.
Here is the finished product! And do you remember the mirror that was Gold to White? Well here it is Black matching the table.
Posted by Jessica and Todd at 11:11 PM 2 comments
Yard Sale Finds

This is going to be Todd's man chair. He has all kinds of ideas for it.
Here it is in it's original state. Kinda hard to see the potential though all the gold.
Posted by Jessica and Todd at 10:54 PM 0 comments
The big purchase
We had a few issues going through escrow, but it was all worth it!!!
Notice the huge TV. Todd is making do with ours for now. Now I could really care less about the TV size, but seriously the wall swallows ours up. Pictures of ours to follow!
Kitchen! We Love all the space.
This is our dinning room.
Master Bedroom
Posted by Jessica and Todd at 10:41 PM 0 comments


